The easiest way to get going is to add a JavaScript snippet to your application.
Get started with no code
To try out the snippet without having to update your codebase, you can make use of our bookmarklet, which you can find over in 'Project Settings'.
Here's a 25-second video showing how to use the bookmarklet to capture events in your website without any code:
Finding the snippet
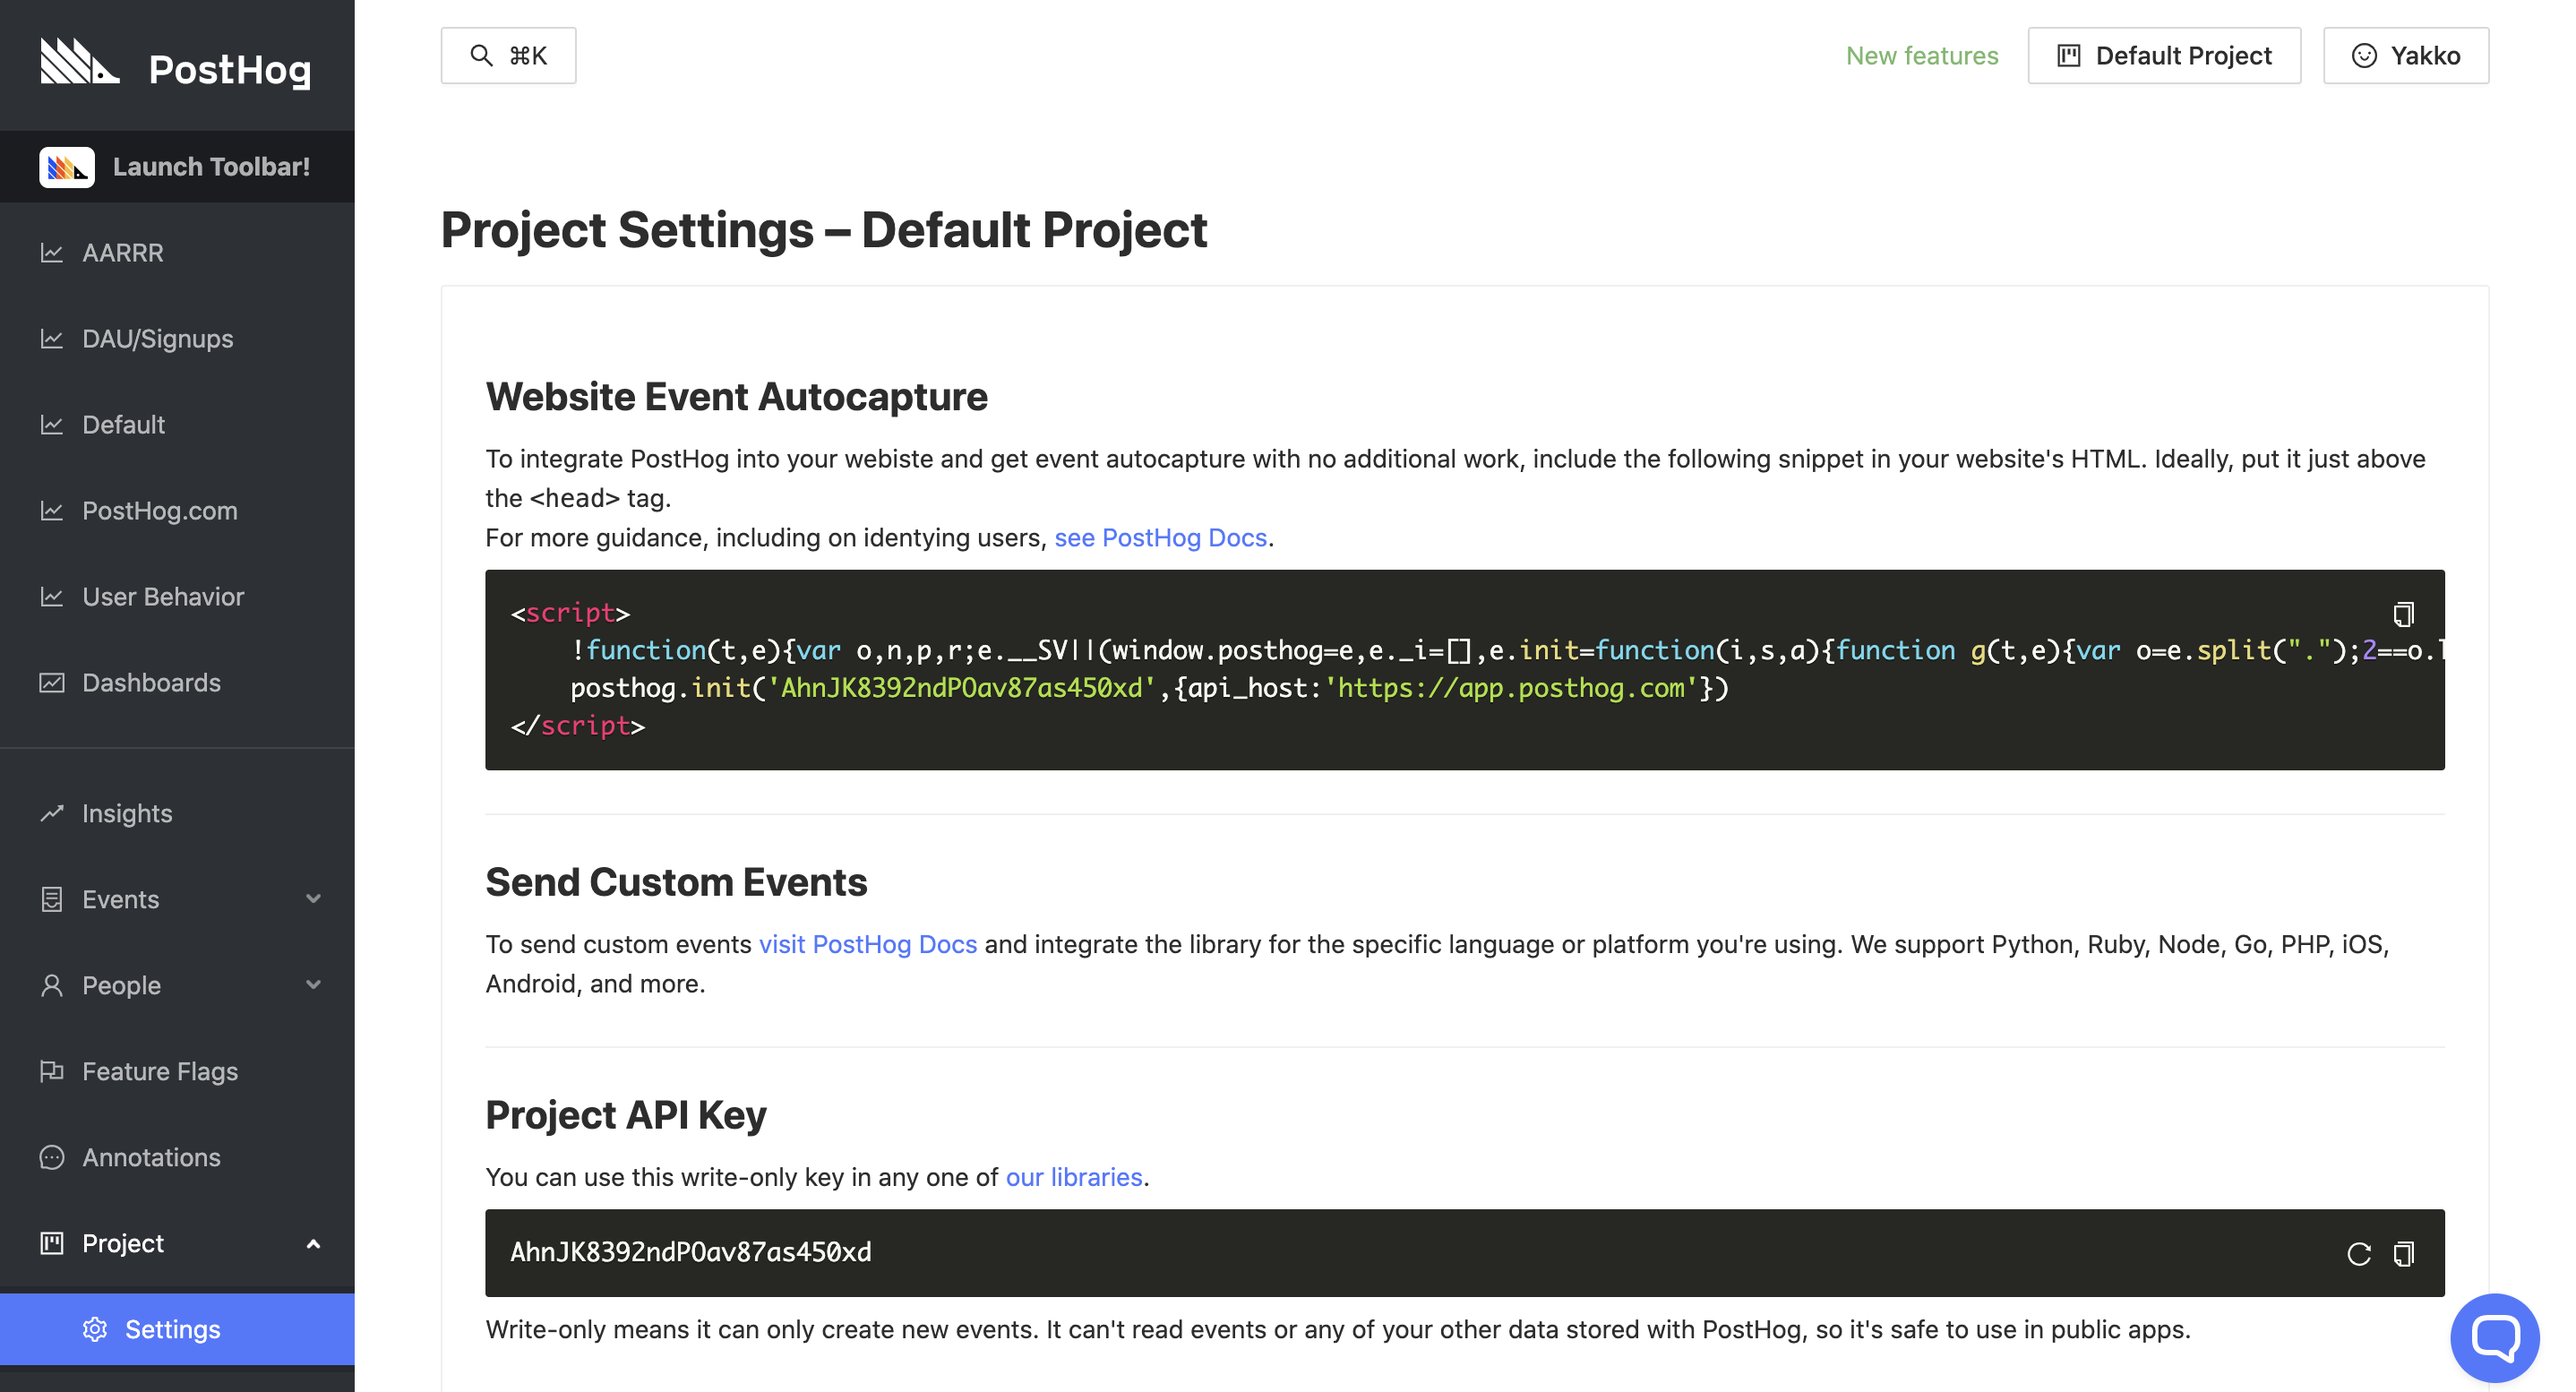
This snippet will be provided to you during setup, but, if you need to access it afterwards, you can find it under 'Project' -> 'Settings':

Adding the snippet to your website
Having copied the snippet from the Settings page, you should now paste this within the <head> tags of your website, ideally just above the closing </head> tag. You will need to do this for all pages that you wish to track.
Website vs app
We recommend adding the PostHog snippet both on your homepage and your application (if you have one). That means you'll be able to follow a user from the moment they come onto your website, all the way through Sign Up and their actual usage of your product.
Adding multiple domains
PostHog supports tracking across multiple domains - just include the same snippet on all the websites you wish to track under the same project.
However, you can also configure "permitted domains" in your 'Project Settings'. These are domains where you'll be able to record user sessions and use the PostHog toolbar.
Ignore/censor elements
PostHog puts a great amount of effort into making sure it doesn't capture any sensitive data from your website. If there are other elements you don't want to be captured, you can add the ph-no-capture class name.
Alternatives to the snippet
You can choose not to use a JavaScript snippet, and can instead use one of our many libraries or our API.